
Identify the Pulley First, Then Use the Right Removal Method
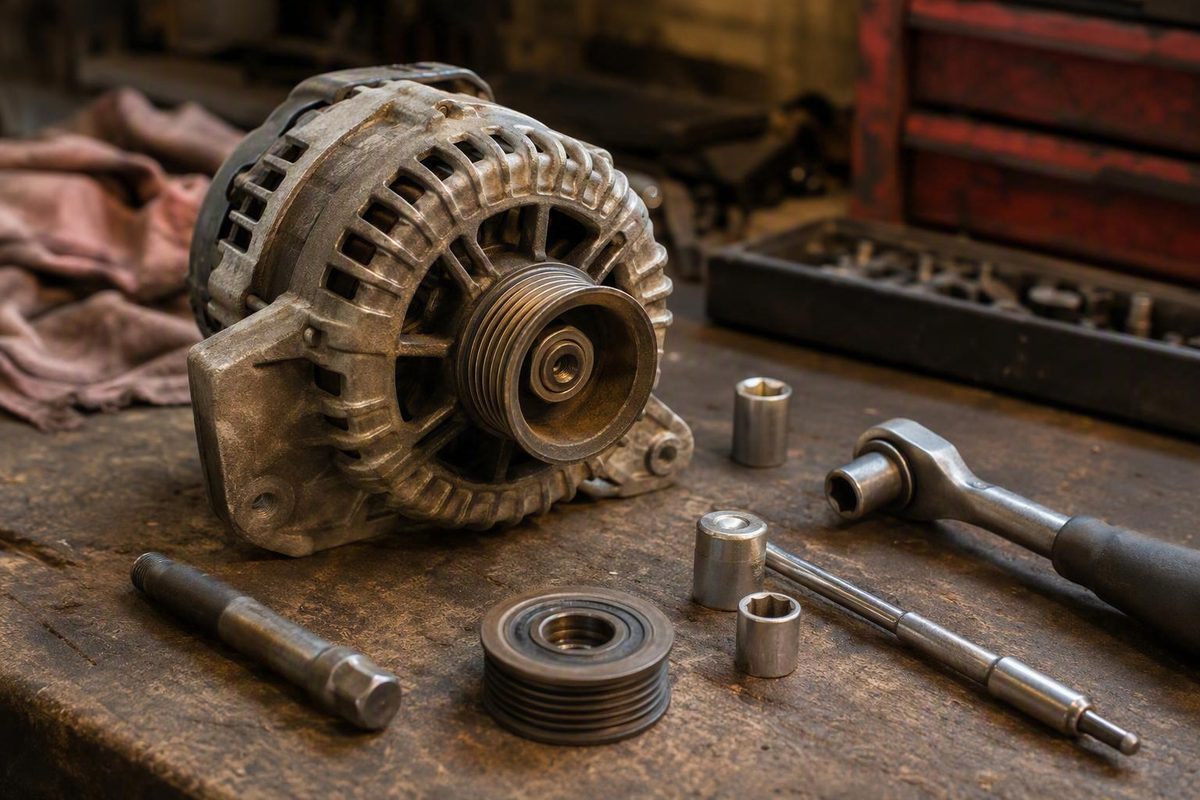
Learning how to remove an alternator pulley begins with identifying the pulley design. A conventional pulley retained by a separate nut does not use the same procedure as an overrunning-clutch pulley or overrunning alternator decoupler. Conventional pulleys also vary: some slide from the shaft after the fastener is removed, while others use a Woodruff key or become stuck through corrosion.
Use this basic workflow:
- Identify the alternator and pulley by application or part number.
- Verify the thread direction and required tools.
- Let the engine cool, disconnect the battery, and remove the drive belt.
- Use the specified counterhold method, adding controlled impact assistance only when permitted.
- Remove the alternator for bench work if clearance prevents full, square tool engagement.
- Stop if a tool interface rounds, the pulley deforms, the shaft moves abnormally, or nearby components are at risk.
Never assume that every pulley loosens counterclockwise, uses the same socket, or slides off once a visible nut is removed. Confirm the procedure for the exact alternator before applying force.
Identify the pulley design before applying force
Start with a visual inspection, but treat appearance only as an initial clue.
Use this decision tree:
- Is there a separate exposed nut at the center? It may be a conventional nut-retained pulley. Look for an internal Torx, Allen, or spline recess in the shaft, or an external shaft hex that can be counterheld.
- Is there a removable plastic cap over a recessed center? It may be an overrunning-clutch or decoupler pulley. Removing the cap can reveal an outer pulley-tool interface and a separate center shaft interface.
- Does the pulley appear to thread directly onto the shaft without a separate nut? Treat it as a possible clutch or decoupler until the application is confirmed.
- Has the retaining nut been removed while the pulley remains in place? Check whether the pulley is a slip fit, uses a Woodruff key, or is stuck through corrosion or burrs.
- Is the alternator remanufactured or previously repaired? Confirm the installed pulley independently rather than assuming it matches the original equipment.
Model-specific examples show both nut-retained pulleys that slide from the shaft and keyed pulleys that must move straight along it. Those examples do not establish the construction of other alternators. The visible hardware must therefore be checked against the alternator number, replacement-pulley instructions, or applicable service information.
Overrunning-clutch and decoupler pulleys are different from simple nut-retained designs. Both transmit drive in one direction and permit overrunning in the other; a decoupler also includes a spring characteristic. They can thread directly onto the alternator shaft and commonly require a matched pulley socket and shaft driver. Gates’ alternator-decoupler training explains the two-tool arrangement and the distinction between one-way-clutch and spring-equipped decoupler pulleys.
Before choosing tools, confirm the pulley through one or more reliable identifiers:
- Vehicle year, make, model, engine, and equipment
- Alternator manufacturer and complete part number
- Markings on the original pulley
- Replacement-pulley catalog data and instructions
- Vehicle or alternator service information
Do not substitute a solid pulley for a clutch or decoupler merely because the belt grooves and mounting dimensions appear compatible. The original pulley technology can be part of the accessory-drive design.
Keep diagnosis separate from removal. Belt noise, startup chirping, or a bouncing tensioner can justify inspecting the pulley, belt, tensioner, idlers, and accessories, but those symptoms do not prove that the alternator pulley has failed. In one application-specific TDIClub discussion, replacing the pulley did not eliminate the original tensioner movement, illustrating why the symptom alone is inconclusive.
Before applying torque, answer four questions:
- Does the pulley use a separate retaining nut, or does the pulley itself thread onto the shaft?
- Is it solid, keyed, overrunning-clutch, or decoupling?
- Which approved feature will counterhold the shaft or pulley?
- What is the verified loosening direction for this assembly?
If any answer remains uncertain, stop and obtain the correct service information.
Prepare the vehicle, work area, and exact tools
Let the engine cool and park on a level surface. Disconnect the negative battery terminal, release the belt tension, and remove the drive belt from the alternator pulley. If access from below is necessary, support the vehicle at its specified lifting points with properly positioned jack stands; never work underneath a vehicle supported only by a jack. These are general preparation measures, and the exact belt-removal and access procedure still depends on the vehicle (general alternator-pulley replacement guidance).
Photograph or draw the belt routing before removal. An underhood routing label can help, but obtain the application-specific routing and tension procedure for reassembly.
Wear eye protection and close-fitting work gloves. Gloves can reduce exposure to sharp edges, but they do not make it safe to restrain a pulley or external cooling fan by hand while an impact wrench is operating. Keep your hands clear of components that could rotate when the fastener releases.
Inspect the area around the alternator for:
- Radiator and condenser surfaces
- Electric or mechanical fans
- Fan shrouds
- Alternator wiring and terminals
- Coolant, vacuum, and air-conditioning hoses
- Engine brackets and mounts
- Body structure
- The full length of the socket, wrench, driver, ratchet, or impact tool
Assess usable working depth rather than measuring only from the pulley face to the nearest obstruction. Both the fastener tool and counterhold must seat fully and remain square while force is applied.
For a conventional nut-retained pulley, gather:
- Exact-size socket or wrench, preferably six-point
- Manufacturer-approved pulley or shaft-holding tool
- Correct Torx, Allen, spline, or external-hex tool where applicable
- Pass-through socket arrangement if required
- Ratchet or breaker bar suitable for the specified manual procedure
-
Torque wrench covering the specified installation value
-
Penetrating oil for an accessible corroded joint
- Approved puller only if the applicable procedure permits one
For an overrunning-clutch or decoupler pulley, gather:
- Specialty pulley socket matched to the outer recessed interface
- Shaft driver matched to the center interface
- Box-end wrench for the pulley tool
- Ratchet or specified handle for the shaft driver
- Torque wrench and required adapters
- Replacement cap when specified
- Instructions for the exact replacement pulley
Sizes such as 24 mm, 15/16 inch, and T50 appear in procedures for particular alternators, but they are not universal. For example, a Crossfire/SRT6 owner discussion describes a 24 mm fastener and T50 shaft interface for the alternators covered in that thread, together with unusually tight working clearance (CrossfireForum’s application-specific account).
Clean dirt from every tool interface before inserting the socket or driver. Fully seat each tool.
If alternator removal will require disconnecting its output cable, keep the battery isolated throughout the job and follow the vehicle-specific alternator-removal procedure.
Remove a conventional nut-retained pulley
Use this procedure only after confirming that the pulley has a separate retaining nut. Do not apply it automatically to a capped clutch or decoupler that threads onto the shaft.
1. Verify the thread direction. Check the alternator service information, vehicle procedure, or replacement-pulley instructions. Some documented conventional examples use standard right-hand threads, but that does not make counterclockwise removal a universal rule.
2. Identify the approved counterhold. Look for an internal Torx, Allen, or spline recess, an external shaft hex, or a dedicated pulley-holding arrangement. Do not use the alternator’s internal components or delicate cooling-fan blades as improvised holding points.
3. Seat the fastener socket fully. Clean accessible rust and debris from the fastener area. Fit the exact-size socket over the full usable height of the nut. If it rocks, fits only at an angle, or appears oversized, replace it with the correct tool before continuing.
4. Use the manual counterhold method where provided. Insert the correct shaft driver fully. Hold the shaft while turning the retaining nut in the verified loosening direction, or hold the nut tool while rotating the shaft if the application’s procedure specifies that arrangement. A pass-through socket or offset wrench may be necessary to engage both interfaces simultaneously.
Manual removal is practical when the shaft provides a suitable counterhold. One user-authored demonstration holds the shaft with a Torx socket and ratchet while turning the pulley nut with a separate wrench; its reported wrench sizes and direction apply only to the alternator shown (Instructables’ nut-retained pulley example).
Keep the tools square. If the counterhold starts climbing out of its recess, release the load and correct the engagement rather than adding leverage.
5. Use controlled impact assistance only when permitted. On a suitable conventional retaining nut, an impact wrench can loosen the fastener without the sustained counterholding required by a normal wrench. Use the correct impact-rated socket and short bursts, inspecting the socket, nut, and surrounding clearance between attempts.
Do not operate the impact wrench continuously while the pulley or fan spins. Do not use this method if the alternator, pulley, or tool manufacturer prohibits it. Impact assistance is an application-dependent option, not a substitute for identifying the pulley and thread direction.
6. Remove and organize the hardware. Once the nut is loose, remove it and record the position and orientation of each washer, spacer, fan, shield, or collar. Do not add a lock washer or threadlocker merely because another alternator uses one; reinstallation hardware must follow the exact application procedure.
7. Determine how the pulley comes off. Inspect the exposed joint before pulling. A keyless slip-fit pulley may slide straight off. A keyed pulley must remain aligned with its key and move straight along the shaft.
Do not twist a keyed pulley aggressively or pry between the pulley and alternator housing. If reasonable straight force does not move it, use the troubleshooting sequence below.
Remove an overrunning-clutch or decoupler pulley
An overrunning-clutch or decoupler pulley generally unthreads from the alternator shaft. It is not usually serviced by removing a separate conventional nut and pulling the pulley forward.
1. Remove the cap, if fitted. Expose the recessed tool interfaces without damaging them. Replacement instructions may call for a new cap after installation.
2. Identify both tool interfaces. The outer feature accepts the specialty pulley socket; the center feature accepts the shaft driver. Match both tools by their actual profiles and required engagement. Do not substitute the nearest-looking spline or bit. Commercial tool demonstrations likewise identify a dedicated spline-tool kit for clutch-style freewheeling pulleys (clutch-pulley tool demonstration).
3. Assemble the tools concentrically. Pass the shaft driver through the pulley socket and engage it fully with the alternator shaft. Hold the outer pulley tool with the specified box-end wrench, then connect the ratchet or approved handle to the center driver.
If either tool is only partly inserted because the radiator, frame, or body structure blocks it, do not apply torque. Improve access or remove the alternator.
4. Create the specified relative rotation. Think of the procedure as rotation of the shaft relative to the held pulley tool. This is clearer than relying on “left” or “right” when the alternator may be inverted on a bench.
Thread direction varies. The Gates demonstration specifies different shaft-rotation directions for right-hand- and left-hand-threaded pulleys, so the replacement instructions or exact service data must control.
5. Unthread and remove the pulley. After the joint releases, continue turning with both tools properly supported until the pulley can be removed without binding.
6. Stop if an interface starts to deform. Release the load if the center driver twists, the spline rounds, or the outer socket cams out. Recheck the pulley identification, tool profile, engagement depth, and thread direction before trying again.
Do not substitute an impact method intended for a conventional retaining nut unless the alternator, pulley, or specialty-tool manufacturer expressly allows it. Replace the pulley with the same specified technology; solid, one-way-clutch, and decoupler pulleys are not automatically interchangeable.
Decide whether to work in the vehicle or on a bench
Some alternator pulleys can be serviced in the vehicle. Others cannot be reached with enough clearance to engage the required tools safely.
In-vehicle service may be practical when:
- The belt can be removed using the correct procedure.
- Both pulley and shaft tools reach full engagement.
- The tools remain square under load.
- The wrench has a controlled working arc.
- The radiator, wiring, hoses, fan shroud, and body remain clear.
- The alternator stays stable as force is applied.
- Removed hardware can be controlled and recovered.
Tool length matters as much as tool type. The nominally correct socket may still be unusable if its body, extension, and ratchet are too long for the available gap. A compact impact wrench may fit where a full-size tool does not, while a rented specialty socket may be longer than the vehicle permits.
Removing an application-specific obstruction such as a fan shroud can improve access, but follow the vehicle’s disassembly instructions. Do not remove clips, wiring, or cooling-system components by guesswork.
Move the alternator to a bench when:
- Either tool engages only partially.
- The tool must operate at an angle.
- The joint is seized and stable counterholding is unavailable.
- The wrench or impact tool would contact the radiator or another component.
- Hoses or wiring cannot be moved safely.
- The alternator shifts in its mounts.
- You cannot monitor the counterhold interface.
- An approved puller may be required.
- The pulley construction or thread direction needs closer inspection.
Bench work is an access decision, not a universal requirement. Gates’ training demonstration removes the alternator and secures it for bench service because access can be difficult on some vehicles.
A protective panel may reduce the chance of incidental contact with nearby surfaces, but it does not provide working clearance. If a tool cannot align naturally, remove the alternator instead of forcing the tool into the gap.
Troubleshoot a seized nut or a pulley that will not come off
When the fastener or pulley refuses to move, escalate methodically.
Step 1: Identify what is resisting. Determine whether the nut is seized, the shaft is turning with the fastener, a clutch pulley is being driven in the tightening direction, or the retaining nut is already off but the pulley is stuck on the shaft.
Step 2: Confirm the design again. Check the alternator number and replacement instructions. A threaded clutch pulley will not respond correctly to a conventional pull-off procedure, while a key can prevent a conventional pulley from twisting after the nut is removed.
Step 3: Reconfirm thread direction. Increasing resistance does not prove that the joint is seized; it may mean the assembly is being tightened. Mark the intended relative movement before retrying.
Step 4: Clean and reseat the tools. Remove dirt, rust flakes, and damaged cap material. Fully insert the socket, Torx bit, spline, or shaft driver. Replace a rounded or loose-fitting tool rather than compensating with more leverage.
Step 5: Apply penetrant only where it can reach an accessible corroded joint. Use a small amount and allow it time to work. Penetrating oil cannot correct the wrong thread direction, a mismatched tool, or inadequate engagement.
Step 6: Retry with controlled force. Keep both tools square and increase force gradually. For a conventional retaining nut, use short impact bursts only if the application permits them. Stop between attempts to inspect the fastener and counterhold.
Step 7: Improve access. If a driver tilts or a wrench approaches the radiator, remove the relevant obstruction according to service information or move the alternator to a bench. Do not solve an alignment problem with a longer lever.
If a conventional nut is off but the pulley remains stuck, inspect for:
- A Woodruff key
- Corrosion between the hub and shaft
- Burrs near the thread transition
- Damaged or mushroomed shaft threads
- Pulley deformation
- Washers or spacers still retaining the assembly
- A design that requires an approved extraction tool
A clean slip-fit pulley may slide off. A keyed or corroded pulley may require straight, even force along the shaft axis.
Use a gear, bearing, or two-jaw puller only when the applicable procedure permits it and the pulley provides approved contact points. Application-specific owner reports disagree about whether conventional pulleys should slide off or require a puller, reflecting differences in design, keys, and corrosion (SteelSoldiers’ keyed-pulley discussion).
Stop and refer the work to an alternator rebuilder or repair shop if:
- The Torx, Allen, or spline counterhold is rounding.
- Shaft threads are damaged.
- The pulley is cracking or deforming.
- The shaft moves abnormally in the housing.
- No approved puller contact point is available.
- The alternator cannot be stabilized.
- The thread direction remains uncertain.
- The approved procedure still does not release the joint.
Professional removal may prevent additional damage when the specified method cannot be completed correctly.
Avoid the shortcuts that damage alternators and injure hands
Do not jam a screwdriver into the alternator to stop the rotor. Internal alternator components are not counterhold points, and retailer-authored technical guidance specifically warns that this method can damage the alternator (PKYS guidance on changing an alternator pulley).
Do not brace a screwdriver against external cooling-fan blades or treat those blades as a general holding feature. Application-specific owner discussions warn that this can bend the blades. Do not hold a pulley or fan by hand while operating an impact wrench, even through a rag, glove, or old belt.
Also avoid:
- Prying between the pulley and alternator housing
- Levering against the radiator or condenser
- Using electrical terminals as support points
- Striking the shaft without an approved procedure
- Air chisels
- Uncontrolled hammering
- Improvised welded tools
- Excessive cheater-bar force
- Clamping delicate housing sections
- Using an ordinary chrome socket with an impact wrench
- Continuing after a tool starts to slip
Stop immediately if:
- A wrench or socket climbs off the fastener.
- The vise, bench, or alternator mounting moves.
- A Torx, Allen, or spline recess begins to round.
- Fan blades or pulley grooves begin to deform.
- The shaft moves abnormally.
- The tool contacts the radiator or another vulnerable component.
- The thread direction is uncertain.
- A specialty tool cannot seat fully.
More force is not the correct response to uncertain identification, poor access, or incomplete engagement. Recheck the design, obtain the proper tool, improve access, move the alternator to a bench, or seek professional help.
If the specialty tool would be used only once, ask a parts store, alternator rebuilder, or repair shop whether it offers pulley-transfer service. Availability varies, so bring the alternator, replacement pulley, and applicable specifications rather than relying on appearance alone.
Inspect, reinstall, and verify the belt drive
After removal, clean the shaft and inspect the assembly under good lighting.
Check:
- Shaft threads for galling, flattening, or cross-threading
- The keyway and Woodruff key, if fitted
- The counterhold recess for rounding
- The pulley mounting surface
- Washers, spacers, and specified retaining hardware
- Pulley grooves for damage or debris
- The shaft for corrosion or scoring
- The front bearing and shaft for abnormal roughness or movement
- The cooling fan and housing for visible damage
There is no universal amount of scoring, corrosion, thread damage, or shaft movement that is acceptable for every alternator. If the replacement cannot seat correctly or the shaft, threads, or bearing condition is uncertain, have the alternator evaluated by a specialist.
Confirm that the replacement is listed for the exact vehicle and alternator part number and that it preserves the specified pulley technology—solid, overrunning-clutch, or decoupler. Do not infer compatibility solely from appearance.
Install the key correctly where one is specified. Start the pulley or retaining nut by hand for several turns; if it binds immediately, stop rather than forcing it with a wrench or impact tool.
Follow the exact service or replacement-pulley procedure for:
- Thread direction
- Installation torque
- Washer and spacer order
- Locking hardware
- Threadlocker use
- Counterholding method
- Cap replacement
- Alternator fasteners and electrical connections
- Belt routing and tension
Do not treat removal effort or reported breakaway force as an installation specification. Do not use a torque value published for a different alternator.
For a clutch or decoupler pulley, start the pulley by hand, install the matched tools, and tighten it in the specified relative direction to the stated torque. Fit the specified new cap after tightening.
For a conventional assembly, install the pulley, key, spacers, fan, washers, and nut in their documented order. Tighten with the approved counterhold. Add no washer, locking compound, or substitute hardware unless the application procedure authorizes it.
Reinstall the alternator if removed, reconnect its wiring as specified, and route the belt using the application-specific diagram. Verify that the belt is seated correctly on every pulley before restoring battery power.
Before startup, remove all tools and confirm that connectors, guards, shrouds, and fasteners are secure. After startup, observe the belt drive from a safe position and check:
- Pulley alignment
- Belt tracking
- Belt wandering or edge contact
- Abnormal chirping, grinding, or rattling
- Excessive tensioner movement
- Charging-system warning lights
- Loose caps or hardware
- Contact with a nearby component
Shut the engine off if the belt starts leaving a groove, the pulley visibly wobbles, or a new mechanical noise appears. General replacement guidance likewise calls for checking belt alignment, noise, and charging warnings after installation (post-installation inspection guidance).
A successful pulley replacement does not guarantee that an existing squeal, vibration, or bouncing tensioner will disappear. If the symptom remains, continue diagnosing the belt, tensioner, idlers, crankshaft pulley, accessory bearings, alignment, and alternator rather than replacing more parts by assumption.
Can I remove an alternator pulley without an impact wrench?
Yes, when the assembly provides a suitable counterhold and you have the correct tools. A conventional design may allow you to hold an internal Torx, Allen, or spline feature—or an external shaft hex—while turning the retaining nut with a wrench or pass-through socket.
An overrunning-clutch or decoupler pulley is normally serviced with a dedicated outer pulley socket and center shaft driver. If the tools cannot remain fully seated and square, remove the alternator for bench service or have a shop transfer the pulley.
Can I remove the pulley while the alternator is still installed?
Sometimes. In-vehicle removal is appropriate only when both tools can seat fully, remain aligned, and move without contacting the radiator, wiring, hoses, fan shroud, or body structure.
Consider the complete tool length. If clearance forces partial engagement or unstable counterholding, remove the alternator.
Which direction do I turn an alternator pulley or retaining nut?
There is no universal removal direction. Verify the thread through exact service information, the alternator part number, or the replacement-pulley instructions.
Some conventional retaining nuts use standard right-hand threads. Clutch and decoupler procedures may instead describe turning the alternator shaft relative to a held pulley tool, with the required direction determined by the thread design.
Do I need a puller after removing the pulley nut?
Not always. A clean, keyless slip-fit pulley may slide off, while a keyed or corroded pulley may resist removal.
Use a puller only when the applicable procedure permits it and the pulley provides safe contact points. Do not pull on thin grooves or fan blades, and never pry against the alternator housing.
What socket size and installation torque should I use?
Use the size and torque specified for the exact alternator and pulley. Reported examples such as 24 mm, 15/16 inch, and T50 apply only to particular assemblies.
Identify the alternator by manufacturer and part number, then consult its service information or the replacement-pulley instructions. Those instructions must also control thread direction, hardware order, cap replacement, and threadlocker use.
In short: identify the pulley, verify the thread direction and exact tools, isolate the battery and belt drive, and follow the appropriate conventional or clutch-pulley procedure. Move the alternator to a bench rather than increasing force in a cramped engine bay. If a tool slips, the shaft or pulley deforms, or the specifications cannot be confirmed, stop and have an alternator rebuilder or repair shop complete the removal.