
Your Car Feels Normal—Here’s How to Respond to the Warning Light
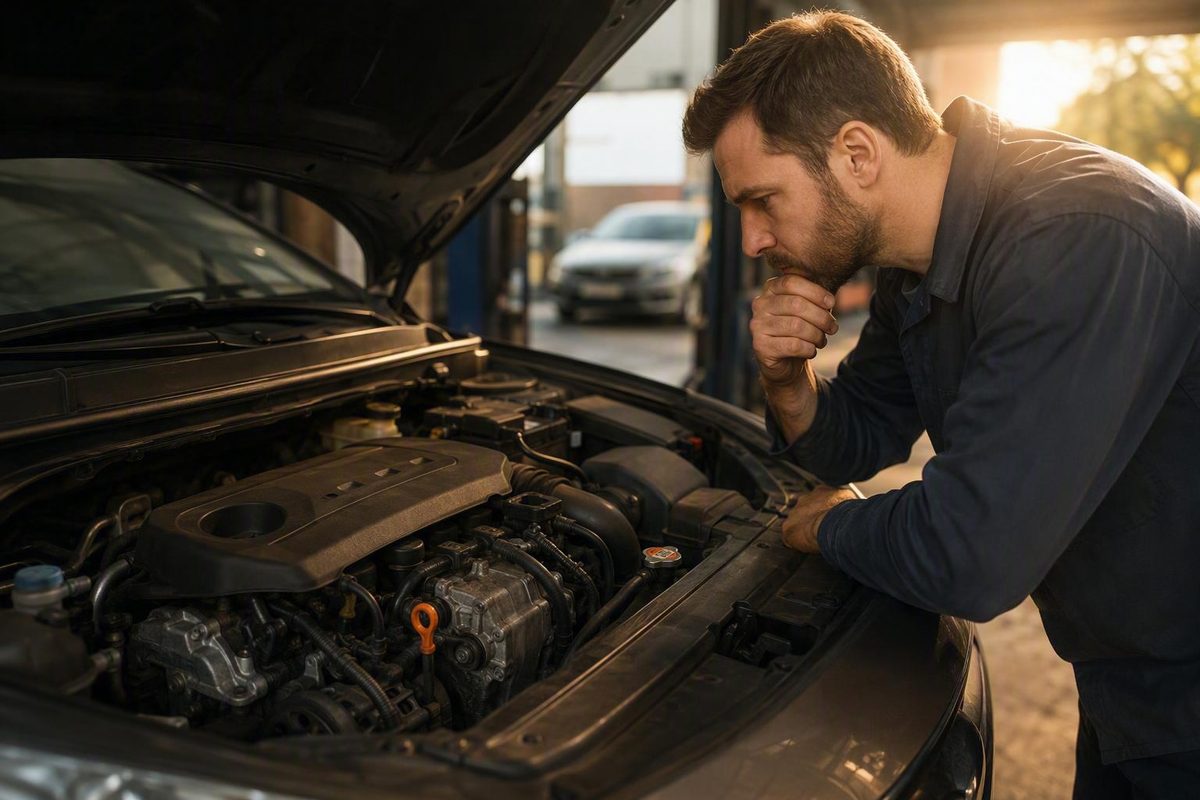
A steady light may permit a short, gentle trip if gauges are normal; flashing, overheating, smoke, leaks or strong odors mean stop and get assistance.
When the engine light is on but the car is running fine, the absence of obvious symptoms is reassuring—but it does not prove the fault is harmless. The vehicle may have detected an emissions, ignition, fuel, sensor, cooling, electrical, transmission-related, or intermittent problem before you can feel it.
Your first task is not to guess which part failed. It is to determine how urgent the warning is, check for signs that make continued operation unsafe, and preserve the diagnostic information stored by the vehicle.
Quick decision guide: drive carefully, arrange diagnosis, or stop now?
Choose the response that matches what the vehicle is doing:
- A short, gentle trip for diagnosis may be reasonable: The check-engine light is steady, the engine is smooth, power feels normal, the gauges and other warnings are normal, and there are no unusual noises, odors, smoke, or leaks.
- Minimize routine driving and arrange prompt diagnosis: The light is steady and the car feels normal, but the cause is unknown. Do not treat normal operation as permission to continue driving indefinitely.
- Stop safely and request assistance: The light is flashing, or the vehicle has severe shaking, stalling, major power loss, overheating, an abnormal oil-pressure indication, smoke, a strong fuel or burning smell, visible leakage, or abnormal mechanical noise. These are general guidelines; the owner’s manual takes priority for your vehicle (Melton Sales’ steady-versus-flashing guidance).
A steady check-engine light may permit a short, low-load trip to a safe location, repair facility, or scanner only when the engine remains smooth, power is normal, the dashboard shows no other serious warning, and no concerning sound, smell, smoke, or leakage appears. Avoid hard acceleration, high speed, towing, and heavy loads while arranging diagnosis.
There is no universal safe number of miles, hours, or days. A minor evaporative-emissions leak and an intermittent misfire can both leave a car feeling normal, but they do not carry the same risk. Urgency depends on the actual fault, vehicle, symptoms, gauges, road conditions, and manufacturer instructions.
A flashing check-engine light should be treated as urgent. It commonly accompanies an active misfire that can send unburned fuel into the exhaust and overheat the catalytic converter, although warning behavior varies by vehicle. Ease off the accelerator, avoid heavy load, move out of traffic, and shut the engine down once safely located. Arrange roadside assistance rather than testing how many more miles the vehicle can travel (Kamphaus Auto Care’s flashing-light guidance).
The steady-versus-flashing distinction does not override other danger signs. Stop safely for overheating, abnormal oil-pressure indication, severe shaking, stalling, substantial power loss, smoke, strong fuel or burning odors, visible leakage, knocking, grinding, or another abnormal mechanical noise—even if the check-engine light remains steady (Kwik Lube’s stop-driving guidance).
Consult the owner’s manual before proceeding. It can confirm the dashboard symbol, describe manufacturer-specific warning behavior, and state whether the vehicle should be shut down, driven cautiously, or transported.
Why the light can come on before the car feels different
The check-engine light is also called the malfunction indicator light, or MIL. It is connected to the vehicle’s onboard diagnostic system, which monitors data associated with engine operation, emissions controls, ignition, fuel delivery, airflow, cooling, exhaust performance, and—on some vehicles—transmission or related powertrain functions.
The controller responds to monitored data rather than the driver’s perception of how the vehicle feels. A sensor signal, electrical circuit, fuel correction, combustion event, or emissions-system test may fall outside its expected range without immediately causing roughness, noise, or loss of acceleration.
Depending on the vehicle and monitor involved, a self-test may run only under particular conditions. Examples can include:
- A particular coolant or ambient temperature
- A defined fuel-level range
- A cold start or completed warm-up
- Steady cruising
- Closed-throttle deceleration
- A particular engine load
- Enough operating time since an earlier test
These are examples, not universal requirements. Enabling conditions and monitoring strategies differ among vehicles.
A fault can occur during a narrow set of conditions and disappear before the vehicle is parked. The warning may remain illuminated because the controller stored a diagnostic trouble code. Intermittent electrical connections, temperature-sensitive ignition faults, small vapor leaks, and problems that appear only under load can behave this way. Extreme Auto Repair’s commercial diagnostic overview likewise notes that some monitored faults occur during specific onboard tests even though the warning remains on after those conditions pass (its explanation of no-symptom faults).
“Running fine” describes what you can currently feel. It does not establish that:
- Emissions controls are operating normally.
- Fuel correction remains within the intended range.
- Every sensor is reporting plausible information.
- Combustion has been normal under every temperature and load.
- An intermittent fault has stopped occurring.
- The computer has identified a specific failed component.
Some faults affect systems that do not immediately change idle quality or power. In other cases, the vehicle’s control strategy may maintain acceptable drivability despite an abnormal input. Neither situation proves the problem is minor.
The no-tools checks to make before driving farther
Begin with observations that do not require disassembly or contact with hot, moving, pressurized, or energized components.
1. Confirm which warning is illuminated. Do not rely on the vague description “engine light.” Compare the symbol with the owner’s manual. A check-engine light is not the same as an oil-pressure, coolant-temperature, charging-system, brake, airbag, or maintenance-reminder indicator. Another warning may call for a different and more urgent response.
2. Watch how the light behaves. Determine whether it is:
- Steady
- Flashing continuously
- Flashing only during acceleration
- Flashing while climbing or carrying a load
- Appearing and disappearing intermittently
A light that flashes only under load is still important. Do not repeatedly accelerate on a public road to reproduce it.
3. Check the rest of the instrument panel. Look at coolant temperature, oil-pressure indication, charging-system warnings, and displayed messages. Stop safely if temperature or oil-pressure indications are abnormal. Do not continue merely because the check-engine light itself is steady.
4. Make a safe visual and sensory inspection. Once parked away from traffic, look underneath and around the vehicle for visible fluid leakage or smoke. Note fuel, exhaust, electrical, or burning odors without placing your hands near hot exhaust parts, belts, fans, wiring, or pressurized systems.
If the engine compartment can be viewed safely, look for an obvious disconnected intake duct, electrical connector, or hose. Treat anything you see as a diagnostic clue—not permission to reconnect an unknown component beside a hot or running engine.
5. Listen and feel. Note rough idle, hesitation, stalling, reduced power, unusual shifting, hard shaking, knocking, ticking, grinding, or an exhaust sound that has suddenly become louder. Shut the engine down if its behavior suggests continued operation could be unsafe. Guidance for a steady light is conditional on normal gauges and the absence of power loss, smoke, leaks, severe vibration, odors, or mechanical noise (Kwik Lube’s driving conditions).
6. Record the circumstances. Write down when the warning appeared and what was happening:
- Immediately after refueling
- After a repair or battery replacement
- During rain, extreme heat, or a cold start
- At a particular speed or engine load
- While towing or climbing
- At a certain fuel level
- During acceleration, cruising, or deceleration
These details may help reproduce an intermittent fault. They do not prove that the weather, fuel stop, battery work, or repair caused it.
7. Check the fuel cap, if the vehicle uses one. With the vehicle safely parked and the engine off, remove and reinstall the cap according to the manual. Tighten it securely and inspect its seal for obvious cracking, distortion, or debris. This is particularly reasonable when the warning appeared after refueling. Follow manufacturer instructions for a capless fuel system.
Possible causes when there are no obvious symptoms
A symptom-free check-engine light has many possible causes. Organizing them by system is more useful than claiming that one is always the “most common.”
EVAP system
The evaporative-emissions system contains fuel vapors rather than allowing them to escape unchecked. An improperly installed or damaged fuel cap, a small vapor leak, a purge-system fault, or another sealing problem can trigger the warning without affecting idle or acceleration. A loose or missing cap can produce an EVAP-related code, but it is only one possibility within the system (AutoZone’s overview of possible causes).
Airflow and fuel measurement
Possible faults include:
- An airflow-sensor circuit or performance problem
- An intake or vacuum leak
- An oxygen-sensor circuit or response issue
- A fuel-mixture condition
- Implausible temperature, pressure, or airflow data
- Wiring, terminal, power-supply, or ground problems
These conditions may initially be subtle. A code that mentions an oxygen sensor or mass-airflow sensor does not prove that the sensor itself has failed. Air leaks, wiring defects, contamination, exhaust leaks, or upstream combustion problems may influence its readings.
Ignition and combustion
Worn spark plugs, ignition-coil faults, damaged wiring, injector problems, air leaks, and mechanical conditions can cause intermittent misfires. A fault may appear only when the engine is hot, under heavy load, or operating in wet conditions, then disappear at idle before the driver notices anything unusual.
Cooling and operating temperature
This must be distinguished from actual overheating: an overheating indication calls for stopping, not continued road testing.
Exhaust and catalyst monitoring
An exhaust leak, mixture problem, misfire, oxygen-sensor fault, or catalyst-efficiency condition may illuminate the light without immediate power loss. The system may be reporting an unexpected relationship between monitored values rather than directly identifying a failed catalytic converter.
Transmission and electrical systems
Recent battery work or low voltage is worth documenting, but timing alone does not establish causation.
This list is a map of possibilities, not a shopping list. Do not clean a sensor, pour in an additive, or replace a component solely because it appears here.
Scan first: what an OBD-II code tells you—and what it does not
A compatible OBD-II scanner can turn a general warning into a narrower diagnostic direction.
The basic process is:
- Locate the diagnostic connector using the owner’s manual.
- Connect a scanner compatible with the vehicle and the information required.
- Put the vehicle into the power or ignition mode specified by the scanner.
- Retrieve all available codes.
- Record each code exactly, including displayed status.
- Save available freeze-frame and relevant live data before clearing anything.
Connector location, scanner capability, power mode, available data, and code status can vary. Follow the vehicle and scanner instructions rather than assuming every car uses the same procedure.
A diagnostic trouble code identifies a detected condition, circuit, or affected system. It does not automatically establish which part has failed. Generic descriptions often include a component name because that component participates in the monitored system—not because the computer has physically tested and confirmed it as defective.
The following table is a simplified generic reference. Definitions, diagnostic criteria, and procedures can vary by manufacturer and model (Wisco Automotive’s DTC family overview).
| Code or family | General direction | Broad alternatives to investigate |
|---|---|---|
| P0440–P0457 | EVAP-system faults | Fuel-cap sealing, vapor leaks, hoses, valves, wiring, connectors, and test conditions |
| P0171 / P0174 | Lean conditions | Intake leaks, fuel delivery, airflow measurement, exhaust leaks, sensor plausibility, and wiring |
| P0101 | Mass-airflow range or performance | Intake leaks or restrictions, contamination, wiring, related sensor data, or airflow outside expectations |
| P0300–P030X | Random or cylinder-related misfires | Plugs, coils, injectors, wiring, vacuum leaks, fueling, compression, valve timing, and other mechanical causes |
| P0420 / P0430 | Catalyst-efficiency conditions | Upstream misfires, rich or lean operation, exhaust leaks, oxygen-sensor faults, wiring, or catalyst condition |
| P0128 | Coolant temperature below the expected regulating range | Thermostat operation, coolant-temperature sensing, wiring, actual warm-up behavior, or related cooling-system conditions |
Consider P0420 or P0430. The code directs attention to catalyst efficiency, but replacing the catalytic converter immediately skips essential questions. Is there a misfire? Is the mixture excessively rich or lean? Is there an exhaust leak near a monitored sensor? Are the oxygen-sensor signals plausible? Catalyst-efficiency codes can have causes other than failure of the converter itself (AutoZone’s code-interpretation guidance).
Likewise, P0300 or P030X does not automatically mean “buy spark plugs” or “replace the coil on that cylinder.” Diagnosis may require differentiating ignition faults, injector operation, wiring problems, vacuum leakage, fuel delivery, compression, valve timing, and other mechanical conditions.
A basic reader or complimentary retail scan can still be useful because it retrieves the code needed to begin the investigation. It is not equivalent to root-cause diagnosis. Many faults require live-data analysis, physical inspection, electrical testing, leak testing, or comparison with vehicle-specific specifications.
Engine Repair Zone describes its editorial approach as favoring testing before replacement and says that every misfire deserves a test before a part (Engine Repair Zone’s About page). Applied here, the principle is straightforward: use the code to form testable possibilities, not to justify buying the first component named in a generic description.
Preserve freeze-frame data before clearing anything
For a qualifying fault, a vehicle may record freeze-frame data: a snapshot of selected operating conditions when the controller detected the problem. Availability and storage behavior differ by vehicle, module, fault, and scanner, so not every code will have an accessible snapshot.
Freeze-frame data can be especially useful when the car currently runs normally because it may show the conditions under which an intermittent or load-dependent problem occurred. Depending on what the vehicle and scanner provide, fields may include:
- Engine speed
- Calculated load
- Coolant temperature
- Vehicle speed
- Fuel-trim values
- Airflow or pressure readings
- Fuel-system status
- Related sensor values
Before resetting anything, save every displayed field. Prioritize the following when available and relevant to the fault:
- Every code exactly as shown
- Available code status
- The complete freeze-frame screen
- Engine speed and calculated load
- Coolant temperature
- Vehicle speed
- Fuel-trim and related sensor values
- Current symptoms and when they occur
- Recent refueling, battery work, repairs, or modifications
Take photographs or screenshots.
Freeze-frame information may remain accessible after the warning turns off, although retention varies. Clearing codes with a scanner can erase that evidence (Innova’s freeze-frame explanation).
If the underlying fault remains, the warning may return.
Clearing codes can also reset emissions-readiness monitors. Those monitors may need to rerun before an inspection, and the required operating conditions differ by vehicle. Inspection rules and allowances for incomplete monitors vary by jurisdiction, so check the current rules where the vehicle is registered rather than assuming that clearing the light will produce a passing result.
Use this sequence instead:
- Retrieve and preserve the available evidence.
- Inspect the system indicated by the code.
- Perform targeted tests.
- Repair the confirmed cause.
- Clear codes only when appropriate.
- Rescan and verify that the fault does not return.
Three common scenarios and the right next move
These scenarios apply the earlier triage guidance. Manufacturer instructions and any new warning or symptom take priority.
Scenario one: The steady light appeared immediately after refueling.
The gauges are normal, the engine is smooth, and there are no smells, leaks, or performance changes. Park safely, inspect the fuel cap and seal, and tighten the cap securely if the vehicle has one. Record that the warning appeared after refueling.
Do not assume the cap caused the warning merely because the timing fits. If the light persists, retrieve the codes. Even when resealing the cap corrects an EVAP fault, the warning may remain until the vehicle completes enough successful self-tests or drive cycles. No fixed trip count applies to every model (Certified AutoBrokers’ drive-cycle discussion).
Scenario two: The light is steady, the car feels normal, and there is no obvious refueling connection.
Minimize unnecessary driving, avoid hard acceleration, sustained high speed, towing, and heavy loads, and arrange prompt code retrieval. A short, careful trip may be reasonable only while the engine remains smooth, power and gauges remain normal, and no smoke, leakage, odor, abnormal noise, or additional warning appears (Melton Sales’ limited-driving guidance).
Scenario three: The light flashes during acceleration or on an uphill grade.
Ease off the accelerator immediately. Do not keep applying throttle to see whether the flashing stops. Move out of traffic, shut down in a safe location, and request assistance. Load-dependent flashing can accompany a misfire that becomes more pronounced under acceleration or climbing conditions.
Override scenario: The light is steady, but another danger sign appears.
Overheating, abnormal oil-pressure indication, smoke, visible leakage, a strong fuel or burning odor, knocking, stalling, severe shaking, or major power loss overrides the steady-light guidance. Stop safely rather than attempting a cautious trip.
If the light later turns off by itself, do not assume the vehicle repaired itself. The fault may have been intermittent, and stored diagnostic information may remain. Scan the vehicle if the warning recurs or any symptom develops.
From warning light to verified repair
A complete diagnosis follows a structured process rather than moving directly from code to replacement part.
1. Document the complaint and conditions. Record whether the light was steady or flashing, when it appeared, how the vehicle behaved, what the gauges showed, and whether the event followed refueling, battery work, or a repair.
2. Retrieve codes and freeze-frame data. Collect all available codes and their displayed status. Save accessible freeze-frame information before clearing anything.
3. Inspect the related system. Look for loose connections, damaged wiring, split hoses, intake problems, exhaust leakage, fluid leakage, poor grounds, and evidence of recent work. The appropriate inspection depends on the code and vehicle.
4. Compare live data and perform targeted tests. Depending on the diagnostic direction, testing may include:
- Checking for intake or EVAP leaks
- Inspecting wiring, terminals, power, and ground
- Evaluating sensor readings for plausibility
- Comparing related sensors instead of judging one value in isolation
- Reviewing cylinder-specific misfire data
- Testing ignition or injector operation
- Evaluating fuel delivery
- Checking exhaust integrity
- Investigating compression, valve timing, or other mechanical conditions
Do not transfer electrical, resistance, pressure, or temperature specifications from an unrelated model.
5. Repair only the confirmed cause. Replace, repair, adjust, or clean a component only when testing supports that action and the manufacturer’s procedure permits it. Parts swapping, additives, and indiscriminate sensor cleaning are not substitutes for diagnosis.
6. Verify the result. Rescan the vehicle and, when safe and appropriate, operate it under the relevant conditions. Confirm that the code does not reset, symptoms do not return, data is plausible, and applicable monitors can run normally.
Professional diagnosis is appropriate when:
- The light is flashing.
- Any stop-now symptom is present.
- The code returns after an attempted repair.
- Multiple related codes are stored.
- Appropriate live data or test equipment is unavailable.
- Diagnosis requires work around fuel, hot exhaust, high voltage, moving components, or a lifted vehicle.
- You cannot perform the inspection safely.
- Vehicle-specific procedures or specifications are unavailable.
If an emissions inspection is approaching, check the current requirements where the vehicle is registered. A cleared warning does not prove the repair succeeded, and incomplete readiness monitors may affect inspection eligibility depending on the vehicle and local rules.
The practical conclusion is simple: a scanner narrows the investigation; testing establishes the repair. Determine whether the light is steady or flashing, stop for danger signs, make only low-risk observations, preserve codes and freeze-frame data, and test the indicated system before purchasing parts. A normal-feeling car may permit a cautious trip for diagnosis under limited conditions, but normal drivability is not proof that the fault is harmless.
Can I drive to work with a steady check-engine light if the car runs fine?
Possibly, but a normal commute should not automatically replace prompt diagnosis. A short, gentle trip may be reasonable when the light is steady, the vehicle remains smooth and responsive, the gauges and other warnings are normal, and no concerning smell, noise, smoke, or leakage is present. Stop if the light begins flashing or the vehicle’s condition changes (Wisco Automotive’s conditional driving guidance).
There is no universal mileage or time limit. If the trip is long, diagnosis will be delayed, or you cannot monitor the vehicle safely, another form of transportation is the more cautious choice.
Can a loose gas cap really turn on the check-engine light?
Yes. On a vehicle with a conventional fuel cap, a loose, missing, damaged, or poorly sealing cap can allow the EVAP system to detect a vapor leak and illuminate the check-engine light.
Inspecting and securely reinstalling the cap is a sensible first step, particularly after refueling. It does not prove the cap is responsible; EVAP hoses, valves, wiring, and other sealing points can produce related codes.
Why is the check-engine light still on after I tightened the gas cap?
The controller may need to rerun the relevant EVAP self-test and record successful results before turning off the warning.
The cap may also be damaged, its seal may not be seating correctly, or the fault may be elsewhere in the EVAP system—or unrelated to refueling. Retrieve the code if the warning persists rather than expecting it to disappear after a fixed number of trips.
Should I clear the code or disconnect the battery before getting the car diagnosed?
Usually not. First save the exact codes, displayed status, available freeze-frame data, and relevant observations. Clearing codes or disconnecting the battery can erase useful diagnostic evidence and learned data without repairing the underlying condition.
It may also reset emissions-readiness monitors. Preserve the information, diagnose and repair the confirmed cause, and clear codes only when appropriate for verification.
What does it mean if the check-engine light turns off by itself?
The fault may have been intermittent, or the controller may have seen enough successful self-tests to stop commanding the light. That does not establish that the underlying problem has permanently disappeared.
Stored information may remain after the light goes out. If the warning returns—or roughness, hesitation, unusual odor, smoke, abnormal gauges, or reduced power develops—scan the vehicle and investigate the conditions recorded when the fault occurred.