
How to Tell Whether the Turbo Is Failing—or Another Boost-System Fault Is to Blame
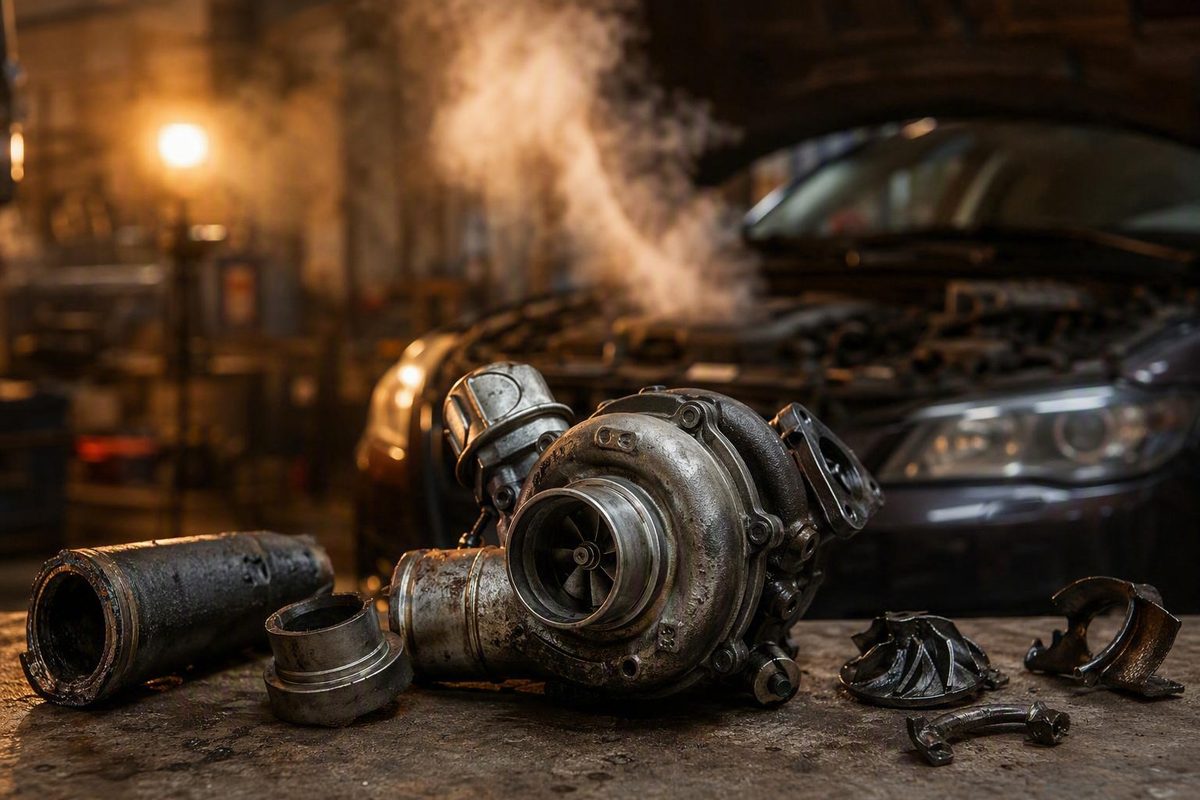
Heavy smoke, rapid oil loss, grinding, scraping, overboost or sudden major power loss mean stop promptly. Milder signs still need diagnosis.
Power loss, smoke, oil consumption, unusual noise, abnormal boost, and warning lights are all possible turbocharger failure symptoms. None proves that the turbocharger itself is damaged.
The same symptoms can come from a split charge hose, leaking intercooler, clogged filter, restricted exhaust, faulty wastegate, actuator problem, sensor discrepancy, lubrication fault, or unrelated engine or fuel-system issue. A dependable diagnosis combines symptom patterns with scan data, leak and restriction testing, control-system checks, and physical evidence before replacement is authorized.
What a Turbocharger Does—and Why Its Symptoms Overlap With Other Faults
A turbocharger uses exhaust flow to spin a turbine connected by a shaft to a compressor. The compressor supplies additional air to the engine, allowing it to produce more power than it could with naturally aspirated airflow alone.
The driver does not directly experience a bearing, seal, actuator, or hose failure. Instead, the driver feels the result: boost may be too low, too high, delayed, or unstable. Oil may enter the intake or exhaust, or airflow may become restricted. Because the turbo operates as part of the intake, exhaust, lubrication, and engine-management systems, faults elsewhere can produce nearly identical behavior.
Treat these warning signs as clues rather than confirmation:
- Reduced or delayed acceleration
- Difficulty maintaining speed under load
- Worsening turbo lag
- Blue or gray exhaust smoke
- Increased oil consumption
- A new whine, hiss, rattle, scrape, or grinding sound
- Underboost, overboost, or erratic boost
- A check-engine light or limp mode
A useful diagnosis separates the possibilities into six categories:
- Internal rotating-assembly damage: bearing trouble, wheel damage, wheel-to-housing contact, restricted rotation, or clearance outside specification when measured correctly.
- Charge-air leakage: split pipes, loose clamps, leaking couplers, damaged seals, cracked intercoolers, or leaks at intake connections.
- Actuator or wastegate trouble: failed vacuum supply, faulty solenoids, sticking wastegates, electronic actuator problems, position-feedback faults, or sticky variable-geometry vanes.
- Intake or exhaust restriction: clogged air filters, collapsed intake paths, blocked catalysts, diesel particulate filter restrictions, or excessive exhaust back pressure.
- Lubrication faults: incorrect or contaminated oil, restricted supply or drain paths, low oil pressure, excessive crankcase pressure, or breather-system trouble.
- Other engine or fuel-system problems: injection faults, sensor discrepancies, wiring defects, combustion problems, or engine wear.
Garrett’s diagnostic guidance similarly recommends checking filters, hoses, fuel injection, the catalyst or DPF, intercooler connections, oil drainage, crankcase pressure, and engine lubrication before blaming the turbocharger itself (Garrett turbocharger system diagnostic guide).
The exact system matters. Gasoline and diesel engines do not always produce the same symptoms. Conventional wastegates, pressure-operated actuators, electronic actuators, bypass valves, and variable-geometry turbos also require different tests. Boost targets, actuator calibration, oil-pressure requirements, test pressures, and permissible internal clearances must come from service information for the specific vehicle.
Turbocharger Failure Symptoms at a Glance
The following table is a starting point, not a replacement decision chart. Its conservative urgency labels reflect guidance to stop for overboost, heavy smoke, or loud turbo noise and to investigate actuator, leak, and control faults before replacing the turbo (turbo actuator and turbo-failure guidance).
| Symptom | What it may mean | Common alternatives | Urgency | Next diagnostic step |
|---|---|---|---|---|
| Weak or delayed acceleration | Boost is not reaching the engine as expected | Charge leak, clogged filter, fuel fault, exhaust restriction, actuator or sensor problem | Inspect soon unless the loss is sudden or severe | Scan for codes and compare requested with actual boost |
| Difficulty maintaining speed under load | Insufficient airflow or boost under sustained demand | Intercooler leak, restricted catalyst or DPF, fuel-delivery problem | Inspect soon; stop if vehicle response becomes unsafe | Review load-related scan data and test for leaks or restrictions |
| New or worsening boost lag | Boost builds later than it previously did | Wastegate, bypass-valve, variable-geometry, intake, or intercooler issue | Inspect soon | Check boost response and actuator operation |
| Lower-than-usual boost | Underboost or lost charge air | Split hose, loose clamp, leaking intercooler, open wastegate, sensor problem | Inspect soon | Pressure-test the charge system |
| Blue or gray smoke | Oil is being burned | Engine wear, valve-related oil control, crankcase ventilation fault, restricted turbo drain | Stop promptly if smoke is heavy or oil is disappearing rapidly | Check oil level and identify the oil-entry path |
| Unexplained oil consumption | Oil is leaking externally or entering the intake or exhaust | Engine oil-control fault, breather problem, external leak | Inspect soon; stop for rapid loss | Document oil-level change and inspect the lubrication system |
| Oil around the turbo or charge pipes | External seepage or oil carried through the intake | Loose connection, breather-system oil, unrelated engine leak | Depends on quantity and oil-level change | Clean, inspect, and trace the source |
| Pooled oil in charge plumbing | Potentially substantial oil entry | Breather-system fault or excessive crankcase pressure | High concern when paired with smoke or documented consumption | Avoid further load and arrange qualified inspection |
| New siren-like whine | Possible rotating-assembly or bearing trouble | Charge-air or exhaust leak | Stop promptly if severe or rapidly worsening | Check external leaks before assessing internal damage |
| Scraping or grinding | Possible wheel contact or internal mechanical damage | Accessory or nearby engine-bay component | Stop promptly | Shut down and arrange inspection before restarting |
| Hissing or whooshing under acceleration | Escaping charge air or exhaust gas | Leaking bypass valve, wastegate plumbing, or exhaust joint | Inspect soon | Pressure- or smoke-test the relevant system |
| Rattle or abrupt sound change | Loose hardware, wastegate movement, bracket problem, or internal damage | Exhaust shield, pipe, or accessory noise | Depends on severity | Inspect brackets, joints, pipes, and controls |
| Check-engine light | The control module detected a system or circuit fault | Numerous non-turbo engine faults | Scan promptly | Retrieve codes, freeze-frame data, and live data |
| Limp mode | The control module limited performance in response to a detected problem | Underboost, overboost, actuator, sensor, wiring, fuel, or emissions fault | Inspect promptly | Record codes before clearing them |
| Erratic boost | Boost control is unstable | Actuator, solenoid, vacuum, wiring, sensor, or calibration fault | Inspect soon; stop for confirmed or strongly suspected overboost | Compare commands, position feedback, and measured pressure |
| Underboost | Requested pressure is not being achieved | Leak, restriction, wastegate, actuator, sensor, exhaust, or turbo fault | Inspect soon | Leak-test and test boost controls |
| Overboost | Pressure is exceeding the expected level | Stuck wastegate, sticky vanes, control-hose or solenoid fault | Stop promptly | Avoid load and diagnose the control system |
Symptoms become more meaningful when they occur together. Blue-gray smoke, a rapidly falling oil level, and severe engine-speed-related mechanical noise are more concerning than low power by itself. Conversely, low power with a stable oil level, no smoke, no mechanical noise, and an audible hiss may fit a charge-air leak better than internal turbo damage.
Onset also matters. Sudden heavy smoke, grinding, scraping, or major power loss demands more urgent attention than gradually increasing lag. Gradual deterioration is not harmless, however. Increasing oil use, repeatedly delayed boost, or a warning light that keeps returning still warrants diagnosis.
Performance and Boost Symptoms: Power Loss, Lag, and Limp Mode
A turbocharged engine may feel weak when it receives less air than the control system expects. The driver may notice delayed response, slower acceleration, difficulty climbing grades, or an inability to maintain speeds that the vehicle previously handled without trouble.
Low power is highly nonspecific. Plausible causes include:
- Split or disconnected charge hoses
- Loose clamps or damaged couplers
- A cracked or leaking intercooler
- A clogged air filter
- Fuel-injection or fuel-delivery faults
- A restricted catalyst or DPF
- A wastegate that does not close correctly
- A bypass-valve fault
- A vacuum leak or failed control solenoid
- An electronic actuator or wiring problem
- Incorrect sensor readings
- Internal turbo damage
Some turbo lag is inherent in normal operation. The useful question is not whether any delay exists, but whether the delay is new, more pronounced, or occurring under conditions where boost previously built normally.
Intermittent limp mode can provide another clue. If performance changes after the ignition is switched off and restarted, the control system may have responded to an intermittent pressure, actuator, sensor, or circuit fault. That behavior does not identify which component failed. Save the original codes and freeze-frame information before clearing them.
One of the most useful scan-tool comparisons is requested boost versus actual boost:
- If requested boost rises but measured boost stays low, the system is not delivering commanded pressure.
- If measured boost rises too far, the system is not controlling pressure correctly.
- If measured boost builds slowly, a leak, restriction, or boost-control problem may be delaying response.
- If the reading jumps or drops erratically, inspect sensor signals, wiring, actuator feedback, and control operation.
This comparison establishes system behavior, not the root cause. The discrepancy can result from lost air, restricted flow, a control fault, an inaccurate sensor, or a mechanically damaged turbo. Automotive trade guidance recommends evaluating requested and measured boost alongside wastegate or bypass-valve commands rather than assuming inadequate boost means a failed turbocharger (AutoSuccess guidance on diagnosing boost and leak problems).
Consider a vehicle with low power, code P0299, and hissing under acceleration. That pattern should lead first to inspection and appropriate leak testing of the charge pipes, couplers, throttle-body connections, and intercooler. Replacing the turbo before checking those components risks leaving the actual leak untouched.
Smoke, Oil Consumption, and Oil in the Intercooler Pipes
Blue or gray smoke commonly points toward burning oil. A turbo-related fault is one possible route: oil may pass into the compressor side and enter the intake, or reach the turbine side and burn in the exhaust. Engine wear, valve-related oil control, crankcase-ventilation trouble, and other oil-entry paths can create similar smoke. Color alone cannot identify the failed component.
Black smoke can accompany insufficient air or lost boost, particularly in diesel applications. If fuel delivery continues while charge air escapes, combustion may become visibly smoky. Fuel-system, sensor, airflow, combustion, and aftertreatment faults are also possible, so black smoke does not prove turbo failure.
White smoke is even less specific. It should not be used as a dependable turbocharger-failure indicator or as proof of coolant entry, a cracked housing, or any other single fault. Diagnosis must identify the substance entering the exhaust and the conditions under which the smoke appears.
Oil in charge plumbing also requires context. A light film by itself does not establish failed turbo seals. The more concerning pattern is:
- Pooled or draining oil rather than a light coating
- A measurable decline in engine-oil level
- Blue-gray exhaust smoke
- Reduced performance
- A new siren, scrape, or grinding sound
- Oil fouling that returns quickly after cleaning
Document oil-level change on level ground using the manufacturer’s checking procedure. Do not infer consumption from residue alone, and do not apply a universal acceptable-consumption limit across engines.
Before blaming the turbo seals, inspect the systems that control oil movement and pressure:
- Oil supply to the turbo
- Oil drain path from the turbo
- Correct oil grade and specification
- Oil condition and contamination
- Engine oil pressure where testing is indicated
- Crankcase pressure
- Crankcase breather or ventilation operation
- Air-filter restriction
- Intake and charge hoses
- Engine lubrication and oil-control condition
Garrett includes oil specification, drain restriction, crankcase pressure, breather operation, air-filter restriction, hoses, and engine lubrication in its smoke-and-consumption diagnostic path.
Heavy smoke or rapid oil loss changes the priority from troubleshooting to damage prevention. Stop promptly in a safe place, shut the engine down, and arrange qualified assessment rather than continuing road experiments; published turbo diagnostic guidance similarly treats heavy smoke as a stop-driving condition.
Turbo Noises: Normal Spool, Leak Whistle, or Internal Damage?
A turbocharger can make a normal spool sound as load and airflow rise. The mere presence of a whistle is therefore less useful than a change from the vehicle’s established sound.
Pay attention to:
- A sound that did not exist previously
- A marked increase in volume
- A change in pitch or tone
- A sound that intensifies with engine speed or load
- Noise that appears with smoke, oil loss, or reduced boost
Hissing, whooshing, or whistling during acceleration often suggests escaping air or exhaust gas. Possible sources include charge pipes, intercooler seams, couplers, seals, throttle-body connections, bypass valves, wastegate plumbing, and pre-turbine exhaust joints. A small leak may become audible only when the system is pressurized.
A siren-like whine that rises with engine speed or load is more concerning because it can be consistent with bearing or rotating-assembly trouble. It is not conclusive: pressurized air crossing a narrow leak or exhaust escaping through a joint can also create a high-pitched sound.
Scraping and grinding deserve a conservative response. They may indicate wheel-to-housing contact, damaged rotating parts, or another serious mechanical problem. Shut the engine down promptly and arrange inspection rather than repeatedly revving it to reproduce the noise. BWD’s diagnostic guidance recommends checking external joints first, followed, where justified, by model-correct inspection of clearances and possible wheel contact (BWD turbocharger diagnosis tips).
A first-line noise inspection should cover:
- Charge pipes and couplers
- Clamps, seals, and throttle-body connections
- Intercooler connections and visible cracks
- Turbo and exhaust support brackets
- Pre-turbine and downstream exhaust joints
- Wastegate and actuator linkages
- Bypass or diverter valves
- Results from an appropriate pressure or smoke test
Do not improvise a compressor-wheel or shaft-clearance check without safe access, complete shutdown, adequate cooling, contamination control, and vehicle-specific procedures. The intake may need to be disassembled without allowing dirt or hardware into the compressor.
Designed axial and radial clearances vary. A finger check without the specified measurement method is not proof of failed bearings.
Warning Lights and Turbo-Related Trouble Codes
A check-engine light is not turbo-specific. Retrieve stored, pending, and permanent codes where supported, preserve freeze-frame information, and examine relevant live data.
The code meanings below are generic starting points. BWD identifies P0299 as underboost and P0234 as overboost while noting that wastegate, hose, and boost-path faults can produce them (BWD code and turbo diagnosis guidance).
| Code | Detected condition | Plausible causes | Appropriate next tests |
|---|---|---|---|
| P0299 | Underboost | Charge leak, wastegate stuck open, intake restriction, exhaust restriction, actuator fault, sensor discrepancy, or turbo damage | Compare requested and actual boost; inspect and pressure-test charge plumbing; test wastegate or actuator operation |
| P0234 | Overboost | Wastegate stuck closed, control-solenoid or hose fault, sticky variable-geometry mechanism, actuator problem, wiring fault, or calibration issue | Avoid high load; compare boost command and pressure; test control hoses, solenoid, actuator, and position feedback |
| P2262 | Boost pressure not detected | Lost charge air, control fault, sensor issue, restriction, or a system that is not producing expected pressure | Verify the vehicle-specific definition; inspect sensor data, leaks, controls, and airflow |
| P2562 | Turbo control-position sensor circuit condition | Position sensor, actuator, wiring, connector, reference-voltage, or mechanical-control problem | Verify the circuit definition; test wiring, position feedback, actuator movement, and required calibration |
| P2563 | Turbo control-position sensor range or performance condition | Sticking mechanism, actuator fault, lost calibration, wiring issue, or implausible position feedback | Compare commanded and reported position; perform the manufacturer-specified movement or relearn test |
P2262 is described as a boost-pressure-not-detected code in diesel-oriented diagnostic material, but its exact wording and diagnostic strategy still need vehicle-specific verification (diesel turbocharger symptom and code overview).
P2562 and P2563 are commonly presented as turbo-position or actuator-related codes. Their exact circuit descriptions, movement tests, and calibration requirements must be checked against information for the specific vehicle rather than inferred from a generic code reader.
Requested-versus-actual boost and actuator-position data add context:
- Persistently low actual boost: investigate leakage, restriction, open-wastegate operation, control faults, and insufficient turbo output.
- Excessive actual boost: focus on the wastegate, vanes, solenoid, hoses, actuator, position feedback, and calibration.
- Slow pressure rise: investigate leakage, restriction, or a slow or sticking control mechanism.
- Erratic pressure or position: investigate wiring, connectors, sensor plausibility, actuator feedback, vacuum stability, and calibration.
A trouble code reports a detected system condition or circuit problem. It is not a parts order.
Mechanical Turbo Failure vs. Boost Leaks and Actuator Faults
The central diagnostic task is distinguishing damaged rotating hardware from faults that prevent an otherwise functional turbo from delivering or controlling air.
| Fault category | Typical clues | Stronger confirming evidence | Tests that help |
|---|---|---|---|
| Internal turbo damage | Severe siren-like noise, scraping, grinding, smoke, oil loss, poor boost | Confirmed wheel damage, wheel-to-housing contact, restricted rotation, substantial leakage, or clearance outside specification when measured correctly | Controlled physical inspection using model-specific procedures; oil-path and root-cause checks |
| Charge-air leak | Low power, hissing under acceleration, underboost, increased lag | Air or smoke escaping from a pipe, coupler, seal, intercooler, or throttle-body connection | Visual inspection followed by suitable pressure or smoke testing |
| Actuator or wastegate fault | Intermittent limp mode, erratic boost, slow boost rise, underboost or overboost, position codes | Failed movement test, unstable vacuum, incorrect position feedback, stuck mechanism, wiring fault, or failed calibration | Vacuum tests, supported scan-tool commands, solenoid checks, wiring tests, movement and calibration procedures |
| Intake, exhaust, fuel, or sensor fault | Low power, smoke, implausible boost readings, poor response under load | Verified restriction, incorrect sensor signal, fuel-delivery fault, excessive exhaust back pressure, or combustion problem | Filter and intake checks, sensor plausibility tests, fuel diagnosis, catalyst or DPF restriction testing |
Evidence for internal damage becomes stronger when several objective findings agree. Examples include a severe engine-speed-related siren accompanied by smoke and falling oil level, visible wheel damage, confirmed housing contact, restricted rotation, or clearance outside specification when measured correctly. Pooled charge-pipe oil combined with documented consumption is more persuasive than an oily film alone.
A charge-air leak means compressed air is escaping before it reaches the engine. Leak points include pipes, clamps, couplers, seals, intercooler end tanks or cores, throttle-body connections, and other joints. Reduced power, P0299, and hissing under acceleration form a useful leak-testing pattern, but quiet leaks are possible.
Actuator and boost-control trouble can be intermittent. Common possibilities include:
- Cracked vacuum hoses
- Weak or unstable vacuum supply
- Faulty boost-control solenoids
- Corroded connectors or damaged wiring
- A wastegate that sticks or does not seal
- An electronic actuator that does not follow commands
- Incorrect position feedback
- Sticky variable-geometry vanes
- Lost calibration after service or component replacement
Power that temporarily returns after a restart can direct attention toward a control strategy or intermittent fault, but it does not prove the actuator is defective.
Whether that is appropriate depends on construction, parts availability, and service information. Some electronic actuators require a specified setup or relearn procedure; installing or adjusting one without that process can leave the system miscalibrated.
A visual inspection may reveal a disconnected hose or oily split, but it can miss a leak that opens only under pressure, temperature, or engine movement. Small leaks may therefore require pressure or smoke testing. Equipment and test pressures must be suitable for the vehicle; ordinary low-pressure equipment may not reproduce every leak that appears during operating boost.
What to Test Before Replacing a Turbocharger
Turbocharger replacement should be the conclusion of a staged diagnosis, not the first response to low power or a fault code.
-
Record the symptoms and operating conditions. Note whether the problem began suddenly or gradually, when it occurs, and whether it changes with load, temperature, engine speed, or an ignition restart. Check the oil level, warning lights, visible smoke, obvious hose damage, and sudden sound changes. Do not repeatedly reproduce severe smoke or mechanical noise.
-
Retrieve codes, freeze-frame information, and live data. Save the information before clearing anything. Compare requested and measured boost using a suitable scan tool. Where supported, examine wastegate or vane commands, actuator position, manifold pressure, airflow, and relevant sensor plausibility.
-
Inspect the air, charge, vacuum, wiring, and exhaust paths. Check the air filter, intake ducting, charge pipes, clamps, couplers, intercooler, throttle-body connections, vacuum hoses, electrical connectors, harness routing, exhaust joints, support brackets, and visible evidence of oil or air leakage.
-
Leak-test the charge system. Use a suitable pressure or smoke test to find leaks that are invisible at rest. Follow vehicle-specific limits and isolate the system as required. Interpret a negative result in light of the equipment, pressure, and setup used.
-
Test boost-control components. Check the wastegate, bypass valve, vacuum supply, control solenoid, hoses, actuator movement, and position feedback. Use supported bidirectional commands where available. Electronic and variable-geometry systems may require manufacturer-specified calibration, adaptation, or relearn procedures.
-
Evaluate the lubrication system. Confirm the correct oil specification and inspect oil condition. Check supply and drain paths for restriction, incorrect installation, leakage, contamination, or carbon buildup. Investigate oil-pressure concerns using the specified procedure and consider crankcase ventilation because excessive crankcase pressure or restricted drainage can disrupt oil flow through the turbo.
-
Check fuel delivery and exhaust restriction. Verify that the engine is receiving and controlling fuel correctly. Where applicable, test for a restricted catalyst or DPF rather than assuming every lack-of-power complaint begins on the compressor side.
-
Assess the turbocharger physically only when justified. With safe access and the correct procedure, inspect for foreign-object damage, chipped or bent wheel blades, wheel-to-housing contact, rotation problems, substantial oil leakage, and measurable clearance outside specification. Prevent contamination during disassembly and do not use generic shaft-play rules.
Garrett warns that turbo damage can be a symptom of an underlying vehicle problem and groups recurring damage pathways around foreign objects, inadequate lubrication, oil contamination, and excessive speed or temperature (Garrett guidance on diagnosis before replacement).
Before authorizing an expensive replacement, ask the repairer:
- What codes, freeze-frame conditions, and scan data support the diagnosis?
- How did requested boost compare with measured boost?
- Was the charge-air system pressure- or smoke-tested?
- Were the wastegate and actuator tested?
- Were vacuum supply, solenoids, wiring, and position feedback checked?
- Were the oil supply and drain paths inspected?
- Were crankcase pressure and ventilation considered?
- Were intake and exhaust restrictions ruled out?
- Is there documented wheel, housing, clearance, rotation, or leakage damage?
- What caused the turbo to fail?
- What will be corrected before the replacement is installed?
The final two questions are essential. If inadequate lubrication, contaminated oil, intake debris, restricted drainage, exhaust back pressure, excessive speed or heat, or a control fault damaged the original turbo, installing another unit without correcting that cause exposes the replacement to the same conditions.
When to Stop Driving—and How to Reduce Future Turbo Damage
No general article can certify that a vehicle with a suspected turbo problem is safe to drive. The decision depends on symptom severity, oil level, boost behavior, vehicle response, engine design, and whether the condition is changing. Use a conservative three-level framework.
Stop promptly and arrange recovery or qualified assessment for:
- Heavy or rapidly increasing smoke
- Rapid oil loss
- Grinding or scraping
- A severe new siren-like noise
- Confirmed or strongly suspected overboost
- Sudden major power loss
- Any combination that makes vehicle control or engine operation unsafe
Move to a safe location and shut down rather than performing repeated acceleration tests. Published diagnostic guidance recommends prompt expert assessment when suspected turbo symptoms appear because continued operation may permit further engine damage (DRiV signs of a failing turbocharger).
Schedule inspection soon for:
- Persistent underboost
- Gradually worsening lag
- A new hiss or whistle under acceleration
- Unexplained oil use
- Repeated warning lights or limp mode
- Reduced performance without severe smoke or mechanical noise
“Inspect soon” is not a guaranteed safe-driving distance. Recheck the oil level using the correct procedure, avoid unnecessary load, and stop if smoke, noise, boost behavior, or power loss worsens.
Continue observation only while arranging diagnosis when the symptom is minor and stable—for example, a slight sound change without smoke, oil loss, warning lights, or altered performance. Record when it occurs and inspect for obvious loose connections. Observation should not become indefinite postponement.
Recurring turbo-damage pathways include inadequate lubrication, contaminated oil, restricted oil supply or drainage, foreign-object ingress, excessive heat or speed, intake leaks or restrictions, exhaust back pressure, and unresolved engine or boost-control faults. Maintenance should therefore focus on the entire supporting system:
- Use oil meeting the manufacturer’s specification.
- Follow the specified oil and filter service intervals.
- Replace or service the air filter as directed.
- Keep intake and charge plumbing sealed and properly secured.
- Investigate abnormal boost, smoke, or oil loss promptly.
- Correct fuel, exhaust, lubrication, or control faults rather than treating only the damaged turbo.
Engine Repair Zone describes its editorial approach as diagnostics before parts, based on its stated hands-on gasoline and diesel engine experience (About Engine Repair Zone). That is an editorial principle, not evidence that any particular turbo has failed: test the system before replacing the part.
Frequently Asked Questions
Can a turbocharger be bad without a check-engine light?
The presence or absence of a check-engine light cannot settle whether the turbocharger is mechanically damaged. The supplied evidence establishes that a warning light has many possible causes and is not turbo-specific; it does not support using the absence of a light as either confirmation or exclusion of internal failure.
If the vehicle has smoke, oil loss, abnormal noise, or reduced performance, diagnose those symptoms directly. If the light is on, retrieve the codes and supporting data rather than treating the light itself as a verdict.
Is some oil inside an intercooler hose normal?
A light oil film can occur without proving turbo-seal failure. Oil mist carried through the intake and crankcase ventilation system may leave residue in charge plumbing.
Quantity and accompanying symptoms matter. Pooled oil is more concerning when paired with a falling oil level, blue-gray smoke, poor performance, or mechanical noise. Document oil consumption and check the turbo oil drain, crankcase pressure, breather system, air-filter restriction, and engine oil-control condition before assigning the cause.
Does a P0299 underboost code mean the turbocharger needs replacement?
No. P0299 reports underboost; it does not name the failed part. Possible causes include charge-air leakage, an open or leaking wastegate, actuator or vacuum trouble, intake restriction, exhaust restriction, sensor discrepancy, or internal turbo damage.
Compare requested and actual boost, test the charge system for leaks, inspect filters and possible exhaust restrictions, and test the wastegate or actuator before considering replacement. Low power, P0299, and hissing under acceleration should place hoses, couplers, connections, and the intercooler near the top of the test list.
Can a turbo actuator or boost-control component be replaced separately?
Sometimes. Depending on the system, an actuator, control solenoid, vacuum hose, bypass valve, wastegate-related component, or intercooler may be serviceable without replacing the complete turbocharger.
Parts availability and procedures are design-specific. An electronic actuator may require calibration or adaptation, and some assemblies are not intended to be adjusted or serviced separately. Confirm the repair method using information for the exact vehicle and turbo system.
Is it safe to drive with suspected turbocharger failure?
It cannot be assumed safe. Stop promptly for heavy smoke, rapid oil loss, grinding, scraping, severe new siren-like noise, overboost, sudden major power loss, or any condition that makes the vehicle unsafe to control. Arrange recovery or qualified assessment rather than continuing to test the vehicle under load.
Persistent underboost, worsening lag, hissing, oil use, or repeated warning lights without severe smoke or mechanical noise still require timely inspection. Whether limited travel is reasonable depends on the vehicle’s response, oil level, fault severity, and specific engine; there is no universal safe-driving distance.
Practical Decision Rule
Interpret power loss, smoke, oil use, unusual noise, boost changes, and codes together. Stop promptly for severe smoke, rapid oil loss, grinding, scraping, a strong new siren-like noise, overboost, or major sudden power loss.
Otherwise, begin with scan data, leak and restriction checks, boost-control testing, and oil-system inspection before authorizing a turbocharger. If internal damage is confirmed, identify and correct its cause before installing another unit.