
Oil Pump Solenoid Leaking Oil? Check the Source and Connector
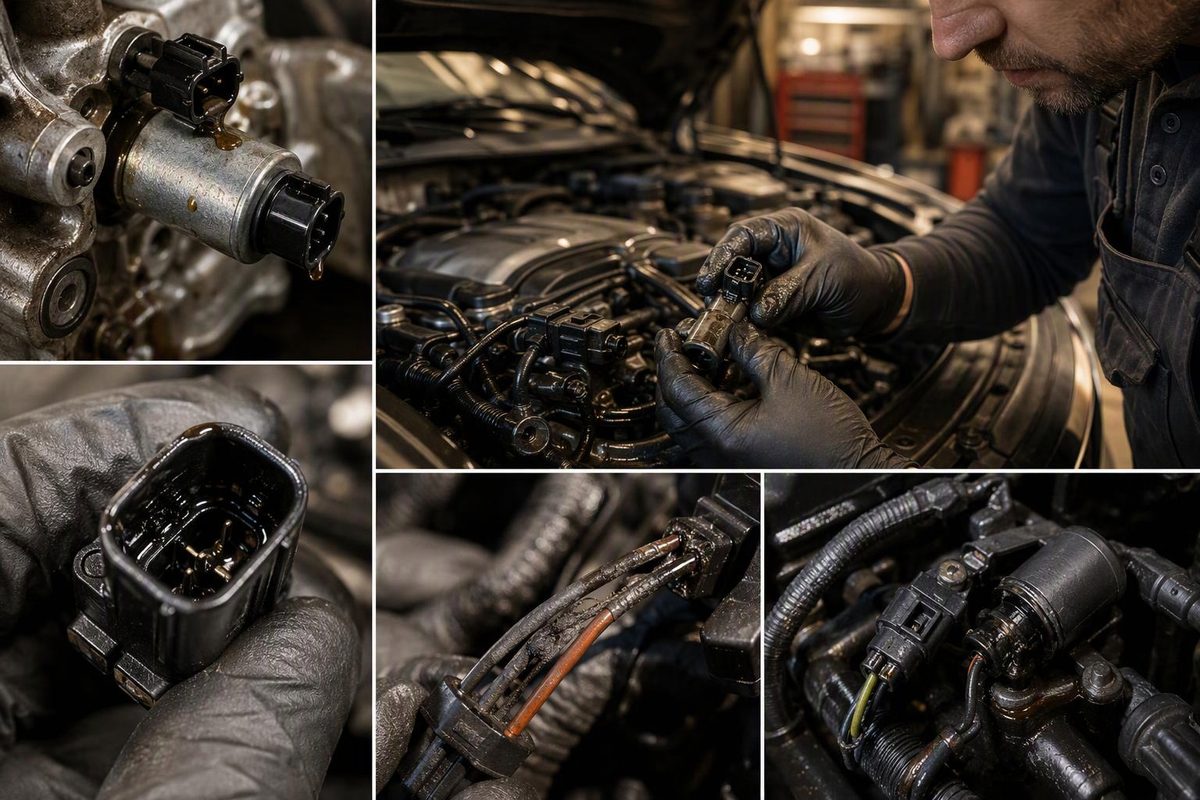
Trace an oil pump solenoid leak, check for oil inside the connector, and distinguish MINI wiring-kit repairs from pump or oil-pressure faults.
An oil pump control solenoid can leak engine oil, but oil around it does not prove the solenoid—or the pump—needs replacement. First establish where fresh oil emerges. Then check whether it is only outside the component or has entered its electrical connector.
That distinction matters on some MINI N16/N18 engines: the manufacturer documents oil migrating into the wiring harness and potentially reaching the engine control module. Its February 2015 repair bulletin specifies a wiring repair kit rather than replacing the solenoid or pump for this condition. MINI SI M11 01 12
Stop first if there is an oil-pressure warning
If a low-engine-oil-pressure warning appears while the engine is running, pull over safely and switch it off. Check the oil level using the owner’s manual procedure. Do not keep running the engine to locate a leak while that warning is active; arrange diagnosis or towing. Ford’s owner guidance likewise directs drivers to stop and turn off the engine for low oil pressure.
Rapid oil loss, new knocking, or smoke from oil reaching hot components also means stop the leak test. A small external seep with no warning needs a different diagnostic path from a pressure-loss complaint.
1. Identify the component before ordering anything
Record the vehicle’s year, model, VIN, engine code and production date. Use the engine-specific component diagram to distinguish the oil pump control solenoid from an oil-pressure sensor or a camshaft-timing oil-control valve. Similar names in parts listings are not enough to establish fitment.
Two documented examples show why engine identification matters:
- MINI N16/N18: SI M11 01 12, revised February 2015, lists R55–R61 models produced through January 2013. Its diagnosis addresses an internal solenoid sealing fault and oil migration into wiring.
- GM 3.0L Duramax LM2/LZ0: The August 2023 version of bulletin 23-NA-011 identifies the oil pump solenoid valve connector as one possible leak location on the listed 2020–2024 Silverado 1500 and Sierra 1500, and 2021–2024 Escalade, Suburban, Tahoe and Yukon models. It also lists the oil-pressure sensor, oil-temperature sensor, oil-filter seal and other possible sources. It is a location guide, not proof that the solenoid has failed. MINI bulletin; GM leak-path guide
Do not apply the MINI repair decision to a Duramax or another engine.
2. Prove where fresh oil appears
With the engine off and cool, inspect the suspect area and the components above it. Photograph the wet area before cleaning. If access requires raising the vehicle, use the specified lifting points and properly rated stands or a lift—never work beneath a vehicle supported only by a jack.
Clean accessible external surfaces with a suitable product, avoiding flooding electrical connectors. Then recheck under the conditions that produced the leak, but only if the oil level is correct and there are no stop-driving symptoms. Keep hands and tools away from moving or hot parts; switch the engine off before any close inspection that requires reaching into the area.
The useful result is the first point where fresh oil returns, not the lowest place where it eventually drips:
| Observation after cleaning | Next step |
|---|---|
| Oil returns above the solenoid and runs down onto it | Trace and repair the higher source first. |
| Oil first appears at the solenoid’s mounting or wiring feed-through area | Follow the engine-specific seal, feed-through or solenoid diagnostic procedure. |
| Oil is found inside the electrical connector | Investigate internal leakage and any documented harness-migration checks. |
| No fresh oil returns | Do not condemn the part from old residue alone; recheck under the original leak conditions. |
For an elusive leak, a technician can use manufacturer-approved engine-oil dye and the specified inspection method. GM’s PIP5398 illustrates the diagnostic sequence—photograph, clean, add dye and confirm the source before dismantling—although that bulletin’s specific repair instructions concern oil pans on different engines. GM PIP5398
3. If it is an applicable MINI, inspect for oil migration
With the engine off, follow the vehicle’s electrical power-down and connector-removal instructions. Wipe exterior oil away before disconnecting the plug so contamination outside is not mistaken for oil already inside. Photograph the connector interior before cleaning it.
Once the leak has been traced to the solenoid fault covered by the February 2015 MINI bulletin, the repair branches are:
| Inspection result | Repair specified in that revision |
|---|---|
| No oil inside the solenoid electrical connector | Install the repair kit for the wire to the solenoid valve. |
| Oil inside the solenoid connector, but none in the DME connectors | Install the solenoid wiring repair kit and the additional N16- or N18-specific wiring harness; do not replace the entire engine harness. |
| Oil inside a DME connector | Install the solenoid wiring repair kit, replace the engine section of the harness and replace the DME, with programming/coding. |
DME means the engine control module. These are the bulletin’s repair criteria for the identified fault, not a universal rule that any oily control-module connector requires replacement. A dry solenoid connector alone is not a reason to install the kit if the leak comes from somewhere else. MINI diagnostic and repair branches
That revision explicitly says not to remove the oil pan, replace the oil pump volume control valve, or replace the engine oil pump for this repair. Confirm current VIN-specific instructions and parts before proceeding. Simply cleaning an oily connector does not complete the prescribed repair.
4. Keep leak diagnosis separate from pressure diagnosis
If there is also a warning or fault code, save the codes and freeze-frame data before clearing them. A visible leak does not establish whether the pump is producing the required pressure.
Have actual oil pressure checked by the vehicle’s specified method, at the specified oil temperature and engine RPM, and compared with that engine’s service limits. Electrical control faults need their own circuit and command-response tests. There is no useful universal pressure or solenoid-resistance number for an unidentified engine.
After repair, restore the specified oil level, clean the affected surfaces and repeat the original leak conditions safely. Verify that fresh oil no longer appears at the repaired point and address any remaining warnings separately. The repair should follow the demonstrated leak path—not just the name of the wet component.