
Exhaust Manifold Leak: Confirm the Noise Before Replacing Parts
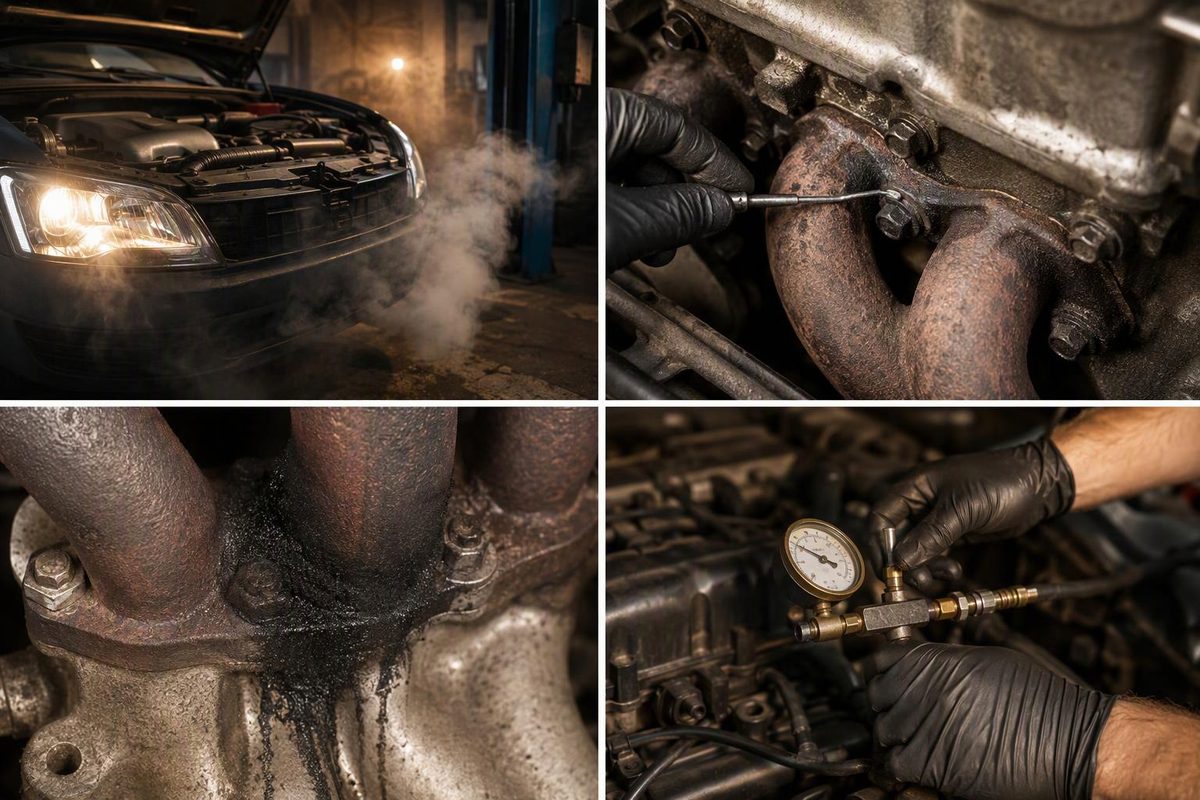
Use cold-start noise, soot, scan data and an engine-off leak test to locate an exhaust manifold leak before ordering parts.
A sharp tick from a cold engine, soot beside an exhaust port, exhaust odor under the hood or a lean code can point toward an exhaust manifold leak. None proves the manifold itself is cracked.
The leak may instead be at a gasket, broken fastener, turbo or EGR connection, oxygen-sensor boss, or the joint between the manifold and front pipe. Locate the escaping gas before ordering parts.
Treat exhaust odor in the cabin as a safety problem
Do not keep driving to “see if it gets worse” when exhaust odor enters the passenger compartment. Carbon monoxide (CO) has no color or odor, so the smell of other exhaust gases is not a reliable measure of CO exposure. The CDC says even a small exhaust-system leak can allow CO to build inside a vehicle. Headache, dizziness, weakness, nausea, chest pain and confusion are possible symptoms; move into fresh air and seek medical help if exposure is suspected. Never run the engine in an attached garage, even with the door open (CDC).
Stop the engine and arrange a tow if fumes are entering the cabin, the leak is severe, nearby wiring or hoses are heat-damaged, or the check-engine light is flashing. A flashing check-engine light usually requires separate misfire diagnosis rather than assuming the exhaust leak explains everything.
Symptoms that make a manifold-area leak plausible
Look for a combination of clues rather than one sound:
- A crisp tick, puff or tapping noise: It commonly follows engine speed and may be most obvious immediately after a cold start. A small gap can become quieter as hot components expand, although not every leak behaves this way.
- Black or gray soot tracking: Dry trails around a port, gasket edge, crack, sensor boss or flange show where exhaust has escaped. Soot at the tailpipe does not locate a manifold leak; see tailpipe soot versus active black smoke.
- Exhaust odor near the engine or in the cabin: Odor may become more noticeable with the HVAC system drawing outside air or under acceleration.
- A hiss, whistle or flutter under load: This is especially relevant around turbocharged-diesel hot-side joints. Volvo/Mack diagnostic guidance directs technicians to inspect for soot tracking and then smoke-test the exhaust when no track is visible (NHTSA-hosted Volvo/Mack guidance).
- A check-engine light or unusual fuel trims: A leak upstream of or near an oxygen or air/fuel-ratio sensor can draw outside air into the exhaust between firing events. The sensor may report a false lean condition, prompting positive fuel correction even when the cylinders are not truly lean (MOTOR).
Reduced power alone is weak evidence. A restricted converter, boost leak, ignition fault or fuel-delivery problem can produce a similar complaint. If restriction is suspected, use a measured catalytic-converter back-pressure diagnosis rather than blaming the manifold.
A diagnostic sequence that identifies the failed joint
1. Record when the symptom occurs
Before disturbing anything, note:
- cold only, hot only or all the time;
- idle, acceleration, engine braking or every operating condition;
- engine speed at which the noise appears;
- whether HVAC fresh-air mode affects cabin odor;
- all diagnostic trouble codes and freeze-frame data.
Do not clear codes yet. Bank-specific fuel-trim or sensor information can help determine which side to inspect, but it cannot distinguish a gasket from a crack.
2. Inspect the engine while completely cold
Use service information for the exact engine and model year to locate heat shields, manifold joints, EGR pipes, turbo connections and oxygen sensors. With the engine off, check for:
- soot radiating from a sealing edge;
- a missing bolt head, loose nut or visibly backed-out fastener;
- a broken stud;
- a cracked manifold or weld;
- a displaced gasket;
- heat damage to nearby boots, wiring and hoses;
- contact marks that could explain a mechanical rattle.
A mirror and bright light can reveal the underside of a manifold. Do not put fingers, tools or test equipment near belts, fans or hot exhaust parts during a running inspection. Sound direction is supporting evidence, not confirmation of a leak.
Also compare look-alikes. Fuel injectors and high-pressure pumps can tick normally. A loose spark plug can make a sharp compression puff and leave combustion residue around its well. Valve-train faults usually originate under the cover rather than at a manifold flange.
3. Confirm the leak with the engine off
A smoke or controlled low-pressure test is more decisive than listening. The exhaust must be cool, and the test should follow vehicle-specific service information because allowable pressure, connection points and components that leak normally vary by application.
A 2023 GM bulletin illustrates one application-specific pressure test for certain 2017–2024 L5P diesel trucks. It directs technicians to connect the prescribed machine at the tailpipe, apply 5–8 psi, coat the listed connections, welds and sensors with soapy solution, and look for bubbles. GM also says leakage at the turbocharger vane-actuator shaft is normal on that application (GM bulletin 23-NA-061). Those instructions are not universal specifications for other engines.
Do not improvise with unrestricted shop air or assume every wisp of smoke condemns a component. Excess pressure can damage parts or create misleading leakage. Some OEM procedures prefer smoke on hot-side assemblies and specifically reject soapy water for that application.
Stop point: Do not order a manifold until soot, visible smoke, repeatable bubbles or the applicable OEM test identifies the leaking area. If testing remains negative, reconsider injector noise, valve train, a loose spark plug, heat shields, a downstream flange or another turbo/EGR joint.
Match the repair to the confirmed failure
- Leaking gasket with sound sealing faces: Replace the gasket and any one-time-use hardware specified by the manufacturer.
- Broken bolt or stud: Extract it without damaging the cylinder-head threads. Check why it failed and inspect the flange for distortion before installing new hardware.
- Warped manifold or damaged sealing face: Measure it against the service limit. Resurfacing is appropriate only when the manufacturer permits it and sufficient material remains; otherwise replace the manifold.
- Visible crack: Replace the manifold unless an approved repair exists for that exact material and application.
- Leak at an EGR, turbo, sensor or front-pipe joint: Repair that joint rather than replacing an intact manifold.
Use the specified tightening sequence, stages, torque and new-hardware requirements for the exact engine. Generic torque figures are unsafe here: fastener size, material, coatings and cylinder-head construction differ.
After repair, repeat the same cold-start or engine-off leak test, inspect for fresh soot, and verify that the original noise or odor is gone. Then clear codes if appropriate and complete the manufacturer’s drive cycle or monitor check. If fuel trims or lean codes remain, continue diagnosing the intake, fuel, ignition and sensor systems instead of treating the new gasket as proof that every fault was fixed.